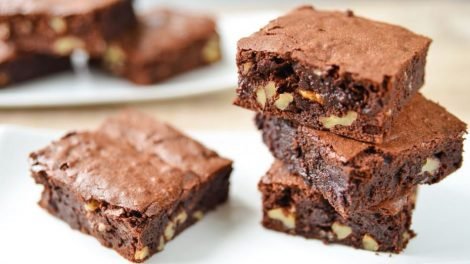
With a deep dark chocolate flavor, and slightly crunchy with the chopped nuts, the brownies that we propose will not leave anyone indifferent.
Arrived directly from the United States, from where it is believed that there is a first mention of this delicious dessert back in 1896, the brownie is a rather small chocolate cake. Its name, in fact, comes from the English brown , due to its external appearance (specifically, its dark brown color). How can we easily do it at home? The truth is that it is actually easier than you think, as we discovered in our recipe for chocolate and walnut brownies.
Believe it or not, its origin -as it happens with other delicious desserts just as traditional- we owe it to a chance. Or, almost better, a mistake. And it was born when an American pastry chef forgot to add yeast to his chocolate cake. This is how the brownie was born, which consists of a wonderful chocolate cake that is usually served individually in square portions, to which no type of yeast is added (hence it is a rather compact cake).
Ingredients
- 100 g walnuts
- 175 g butter (cubed)
- 300 g of dark chocolate (minimum 70%)
- 25 g cocoa powder (unsweetened)
- 300g sugar
- 4 eggs
- 200 g of flour
Elaboration
- Preheat the oven to 200ºC.
- Grease a square-shaped baking pan (ideal 23 x 30 cm), and line it with parchment paper.
- Chop the walnuts a little and set them aside.
- Put the butter cut into cubes and the dark chocolate in a refractory bowl in a bain-marie. Melt it well, stirring with the help of a wooden spoon, until you get a rather smooth mixture. Then remove and let it cool down a bit. If you wish, you can also do it in the microwave (at medium power and with 15-second intervals, stirring in the interval). Once cold, mix well with the sugar.
- Beat the eggs in a bowl. Once blended, add them to the dark chocolate and butter mixture, beating well until the ingredients are combined.
- Sift the flour and cocoa into a bowl. Then add them to the chocolate mixture little by little, mixing well until you get a smooth dough (and no flour stains) but thick.
- Add the slightly chopped walnuts, distributing them well throughout the dough.
- Pour the dough mixture into the mold, and spread with the help of a spatula to fill the corners without problem. It is convenient that you smooth the surface.
- Bake for 12 to 15 minutes, until when pierced with a skewer or knife it comes out covered with a little batter, but is firm to the touch on the top. Once this is reached, remove from the oven and let the brownie cool completely in the pan.
- Once cool, carefully lift the brownie out of the pan. With the help of a sharp, long serrated knife, score a total of 24 equal portions on the surface. In order for the portions to come out well cut, it is necessary to add a little boiling water in a bowl, and between cuts, submerge the knife in the hot water, then dry it well before proceeding to the next cut.
- To finish, sift with a little more cocoa powder on top.
How to Preserve the Chocolate Nut Brownie:
The truth is that the brownie keeps perfectly well for 3 days in an airtight container. Also, if you keep it in the fridge it will acquire an even more delicious texture (personally, I love it cold, more than served hot).
How can we eat it?
It is very common to serve the portion of hot brownie, accompanied with a scoop of ice cream (preferably vanilla). Although if you want to try an innovative option, you can choose to add a scoop of banana or strawberry ice cream.
However, there are also those who enjoy it individually, cold and unheated.


